I had been eying the Restoration Hardware round farmhouse table for some
time, but not the price tag. I knew I could have my engineer hubby
build me one just like it for a fraction of the price.

There are many
farmhouse table tutorials out there, so I won't go through every single
step on how to make this, BUT I will tell you
- what we did to make the round shape of the table
- how to make every board line up perfectly with the board next to it
- how to make your own Restoration Hardware gray washed stain.
The chairs are the Remy Side Chairs in Burnished Steel from Restoration Hardware.

We didn't buy our wood from Home Depot or any regular home repair store like that. We drove to SLC to a place called MacBeath's where we were able to select pretty much any type of wood we wanted. We chose to use pine. The boards were 2" thick and anywhere between 7" and 9" wide. We wanted a 60" diameter table, so before we went to Macbeath's, Engineer Hubby drew the table top to scale and estimated the number/length of boards needed.

We had Macbeath's run the pine through a planer and jointer so all sides of the boards were smooth and straight. This was crucial to getting the boards to line up perfectly while we built the table. It makes it so much easier if you don't skip this step! Here are our boards before they went through the planer.

We joined and glued the boards together using #20 biscuits and wood glue. This picture shows a few of the biscuits in place in the edge of a table top board. We generally spaced our biscuits between 12" and 18" on center with a smaller spacing for the outside boards that are not supported by the base.

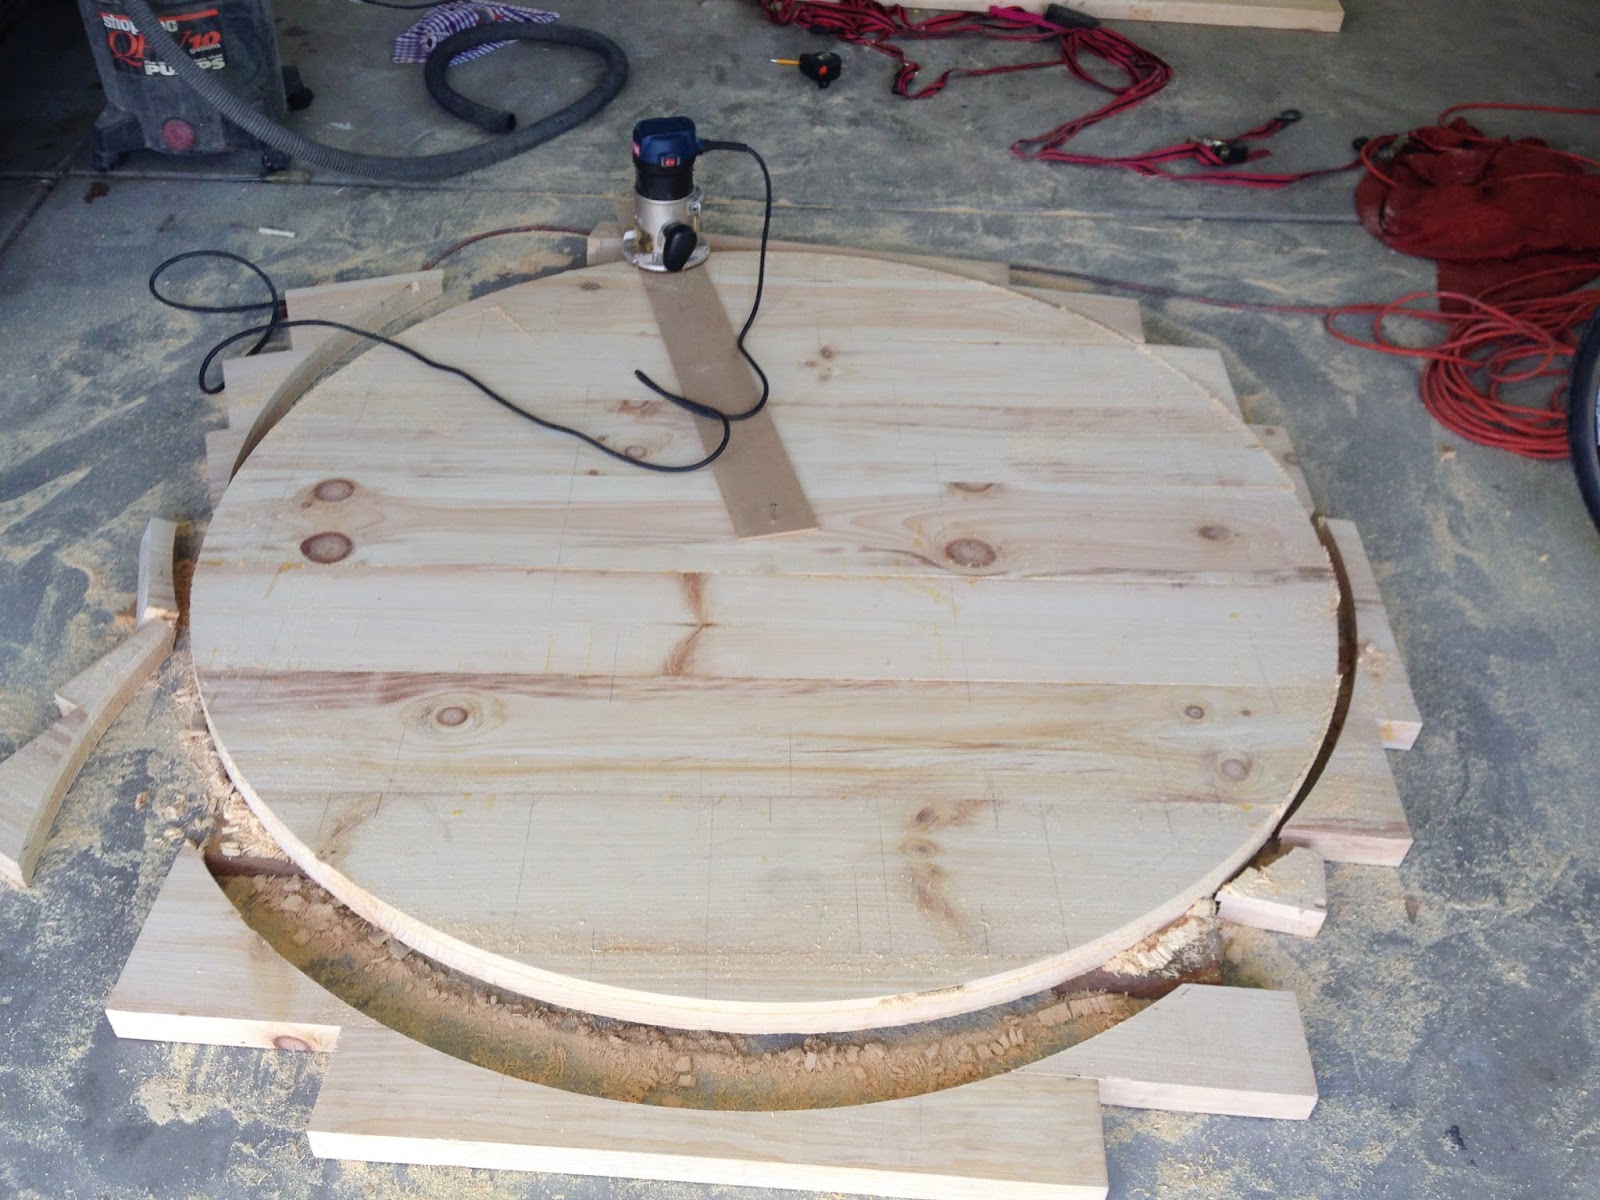
This is how we cut the round shape of the table. Using a screw at the center of the table as a pivot and a router mounted to a pivot arm (a scrap piece of particle board) we made a rough cut circle in two passes.

After cutting through half the thickness of the wood with the first pass, we flipped the table top over and cut through the remainder with the second pass. This left us with a fairly rough edge but we were able to clean it up quickly with a belt sander.
On to the beautiful base of the table. My husband is just super handy, so there is no way I can explain this step, however there are many tutorials online for table bases. You need only search.

To get the perfect gray washed stain that you see from Restoration Hardware, simply mix 50% Minwax Provincial with 50% Minwax Weathered Oak. We only did 1 coat of stain and then sprayed on three coats of water based polyurethane. Also, before staining, we used a wood conditioner.

Close ups on the true color of the table.


We actually stained our floor with Minwax Provincial, so in this picture it's easy to see the difference the mixture makes when Minwax Provincial is combined with Minwax Weathered Gray.

So what do you guys think? We all love it over here!