|
| Are these projects amazing or what?! |
We are thrilled to have the chance to post as guests with POV this month!
Here's a list of everyone involved.
Just click on each link to see a tutorial of their project.
Camilla: rosyredbuttons.blogspot.com
Amy: amerooniedesigns.blogspot.com
Gwen: gwennypenny.com
Michelle: alittletipsy.com
Jonie: easyascutandpaste.blogspot.com
Steph and Meg aka the DIY Divas: doityourselfdivas.blogspot.com
Amy: amerooniedesigns.blogspot.com
Gwen: gwennypenny.com
Michelle: alittletipsy.com
Jonie: easyascutandpaste.blogspot.com
Steph and Meg aka the DIY Divas: doityourselfdivas.blogspot.com


The Sweetheart Shirt
1. A bit of lace

2. A shirt

3. A bit of Interfacing or Pellon

Let's Get Started:
1. Cut a heart out of the lace, whatever size you wish

2. Place the lace heart on shirt

3. Place interfacing/pellon inside the shirt directly beneath the lace heart

4. Pin the heart and interfacing to the shirt


That's it... now it is time to strike a pose

Happy Valentine's Day!


The only thing I did purchase was a package of doilies. They sell every size imaginable.

Here is what I did to create this fun and festive garland.
1. Cut various sized hearts out of burlap, felt and other fabric. (word of warning.. burlap is a bit messy.)

2. String twine, or ribbon through the hearts and doilies in whatever pattern you see fit.

3. Hang garland anywhere, and in my case, EVERYWHERE!


Happy Valentine's Day!

You guys will die and go to heaven when you hear my talented little brother Jason Wadsworth and his friend Matt sing this Radiohead cover of You. L.O.V.E!!
And here is another one. Coldplay Amsterdam
Jason you are so talented, I had to let the world know.
Steph


Part 1 - Plans and Center Storage
Good Luck!!
Stephanie
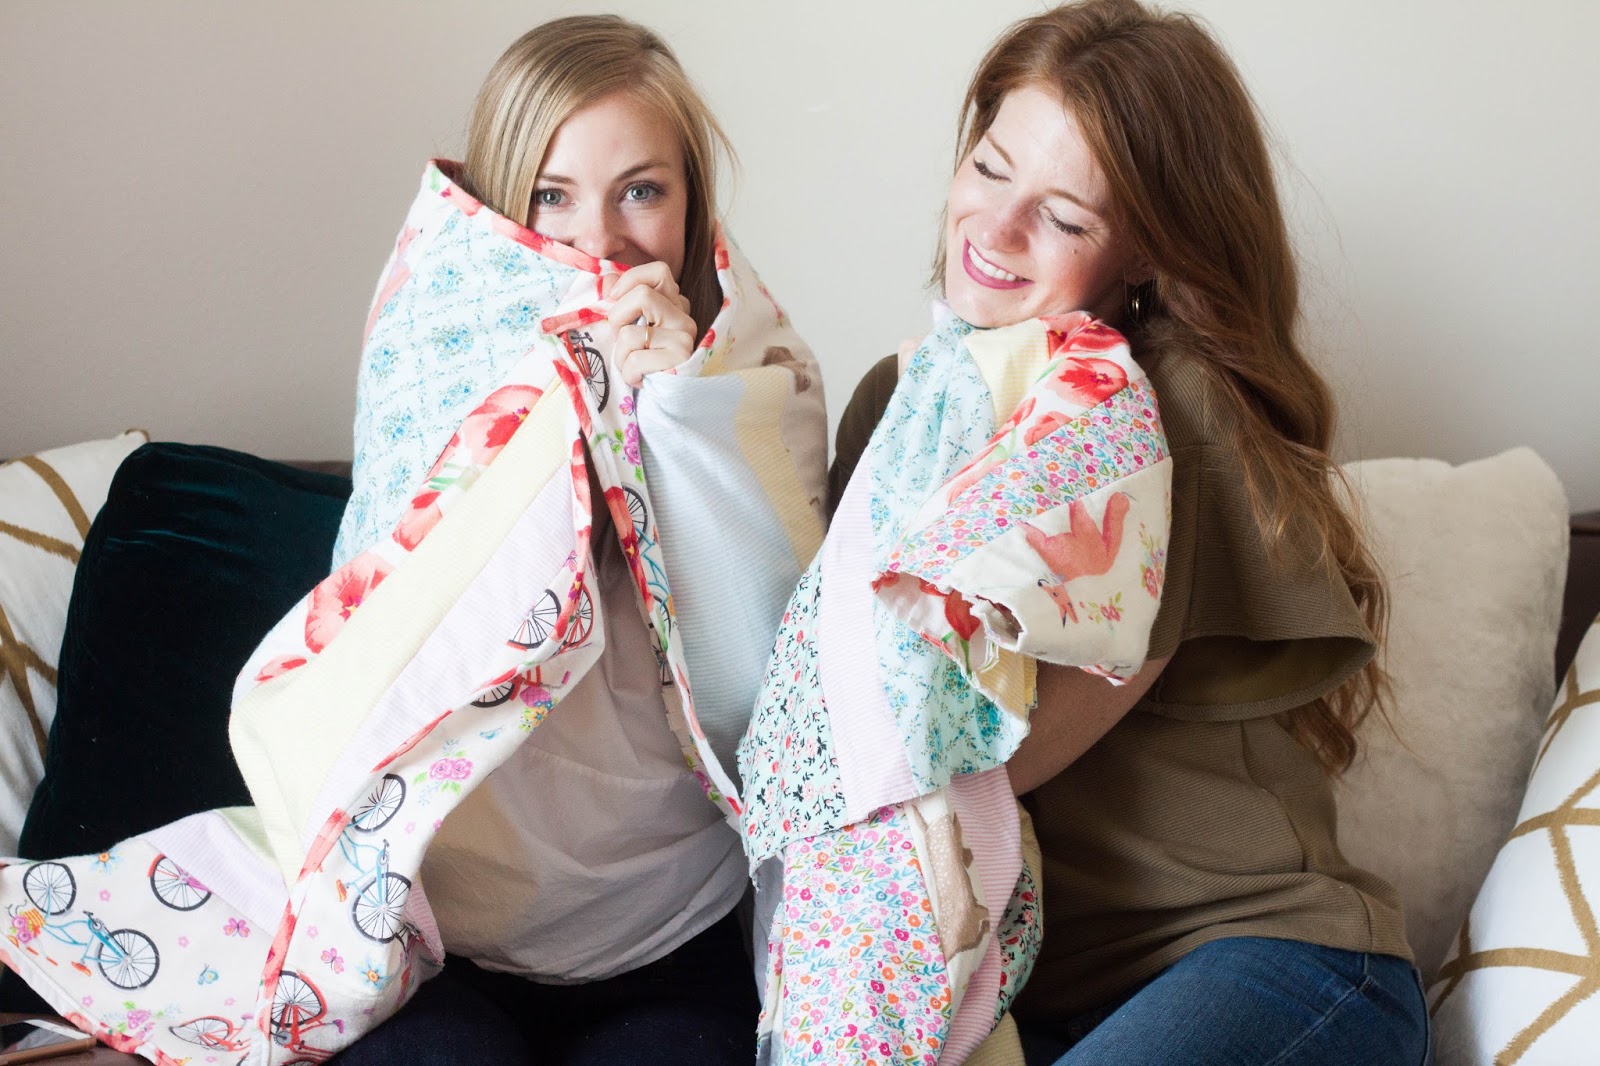
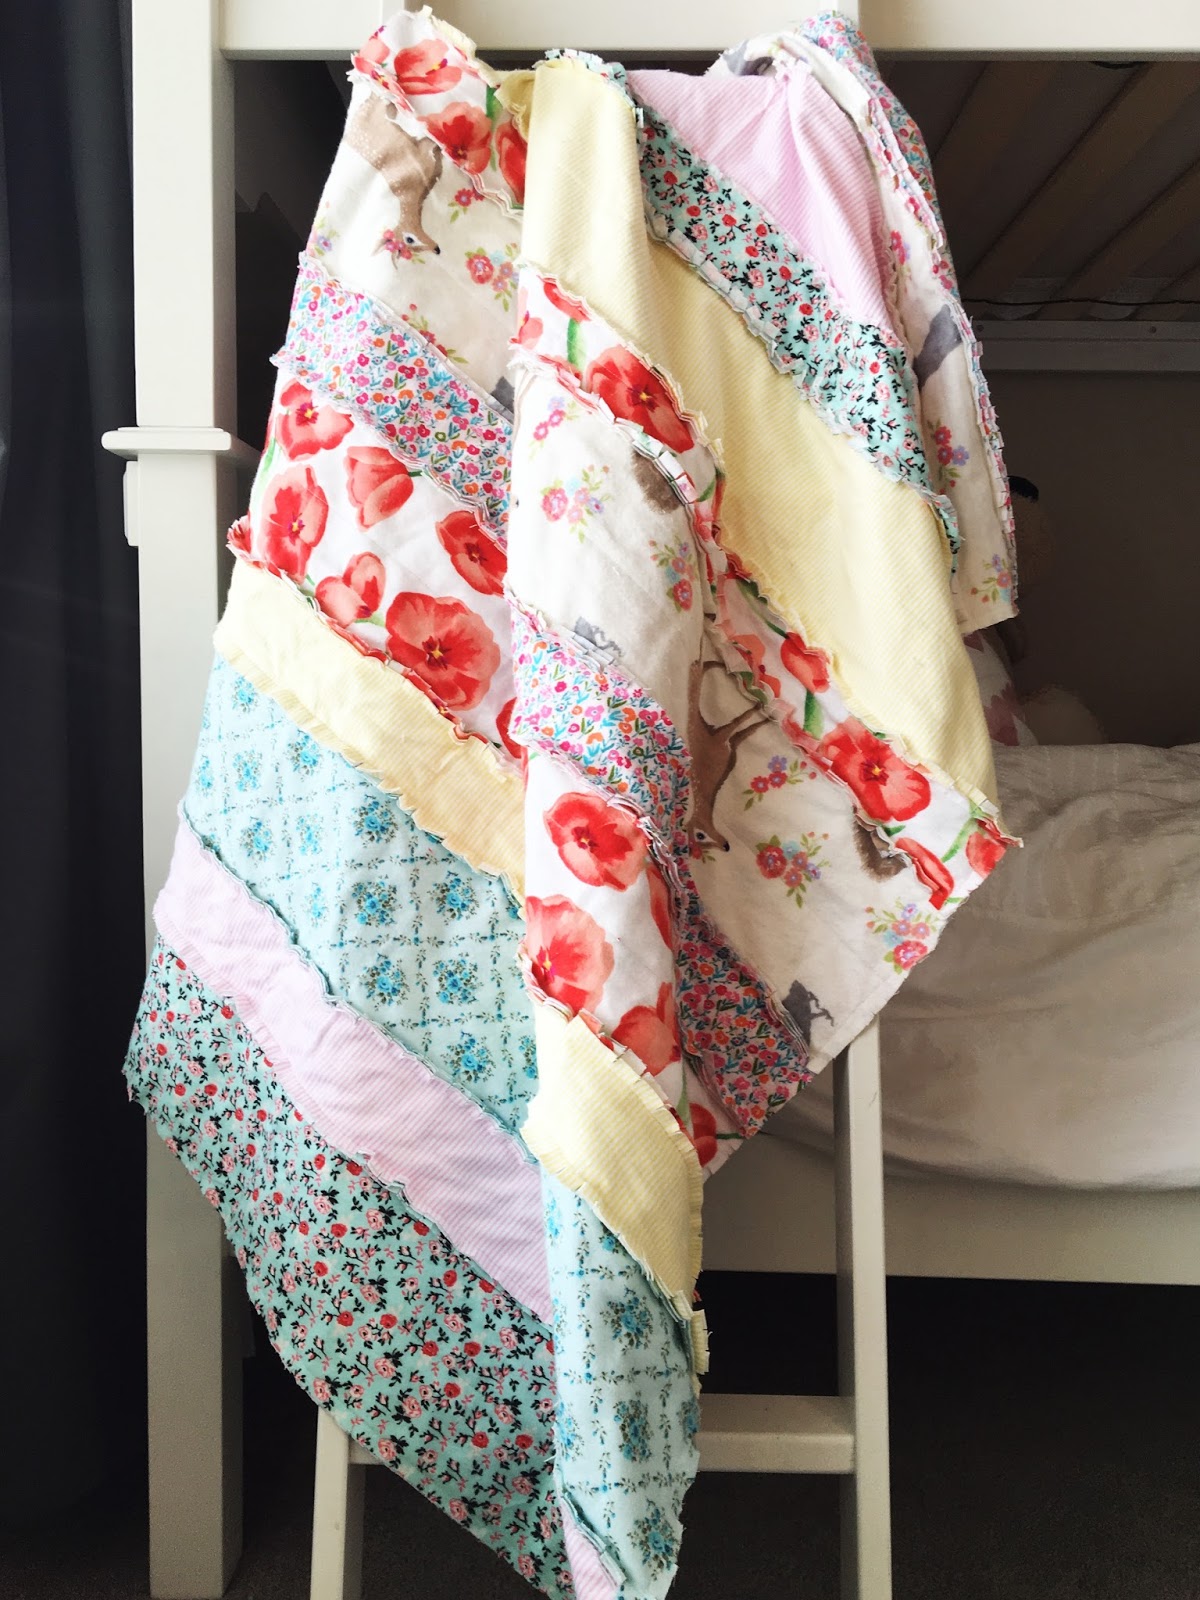
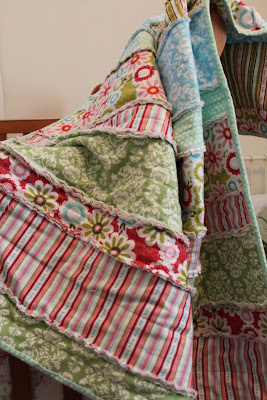
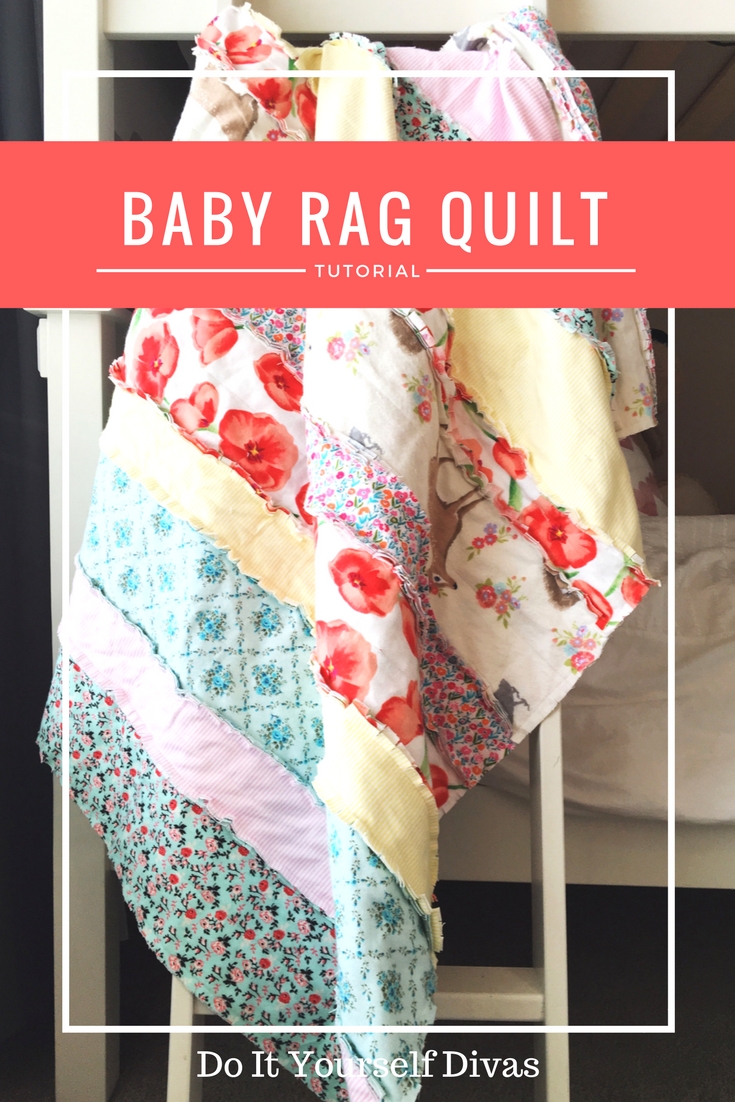
This is the softest little quilt made of flannel. The best part about it is how dang easy it is to make! You can have it done in just a couple hours.
All you need:
7 different, yet coordinating flannel fabrics cut @ 1/2 a yard each
(so 7 half yards of fabric)
2 yards of solid flannel fabric for the batting (the middle of the quilt)
(white is usually the best, and this can be omitted if you wish)
about half a yard of matching fabric for the binding
>>DIY Binding Video Here<<<
>>DIY Binding Video Here<<<
matching thread
sewing machine
scissors (these are our favorite!)
DIY Baby Rag Quilt Video:
DIY BIND A Quilt Video:
Written Instructions For Rag Quilt
DIY Baby Rag Quilt Video:
DIY BIND A Quilt Video:
Written Instructions For Rag Quilt
And here is how it is done:
* Cut 2 strips of each fabric @ 6 inches wide (one strip will be the front and one the back)
* Cut strips 2 of each fabric @ 3 inches wide (one strip will be the front and one the back)
* Cut 7 strips of solid flannel @ 6 inches wide (this will go in between the other fabric strips measuring 6 inches wide)
* Cut 7 strips of solid flannel @ 3 inches wide (this will go in between the other fabric strips measuring 3 inches wide)


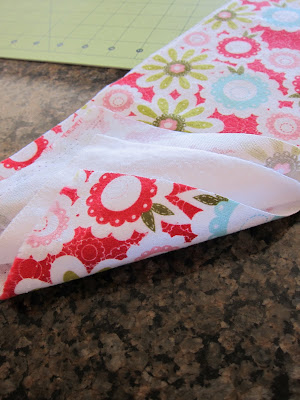
Make a fabric sandwich like the picture above and below!
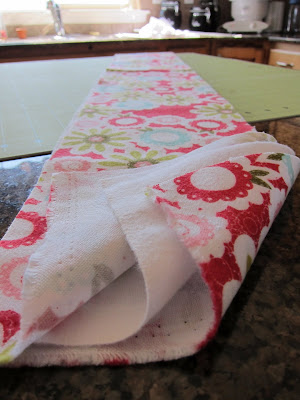
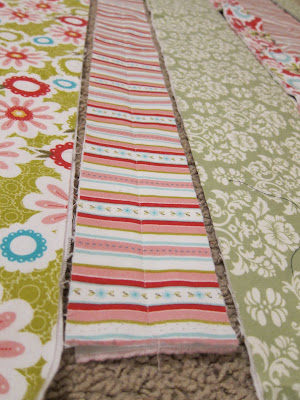
Now sew a seam down the middle of each fabric sandwich to hold all three pieces together.


Once you have sewn a seam down each fabric sandwich strip lay out your quilt.

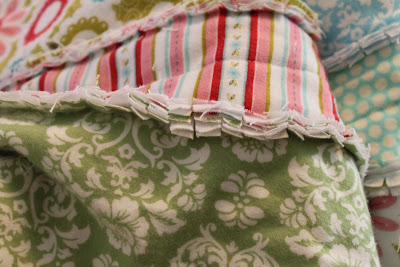
Sew it together (ALWAYS RIGHT SIDES TOGETHER so that there is a tiny bit of fabric that you can snip. You choose the "right" sides for this quilt. One side of the quilt will be smooth and the other raggy.)
Snip fabric with scissors along each sewn line.
(sorry for the lack of pictures to describe this... if you have any questions please email me or just ask with a comment!!)

Bind it


Wash it... this will make it more raggy and get rid of all the little strings!!


It's finally time to finish this bed!!! You will see that we made a couple of mistakes, but things aren't always pretty behind the scenes. We learn as we go. Engineer Hubby will be the author of this post.
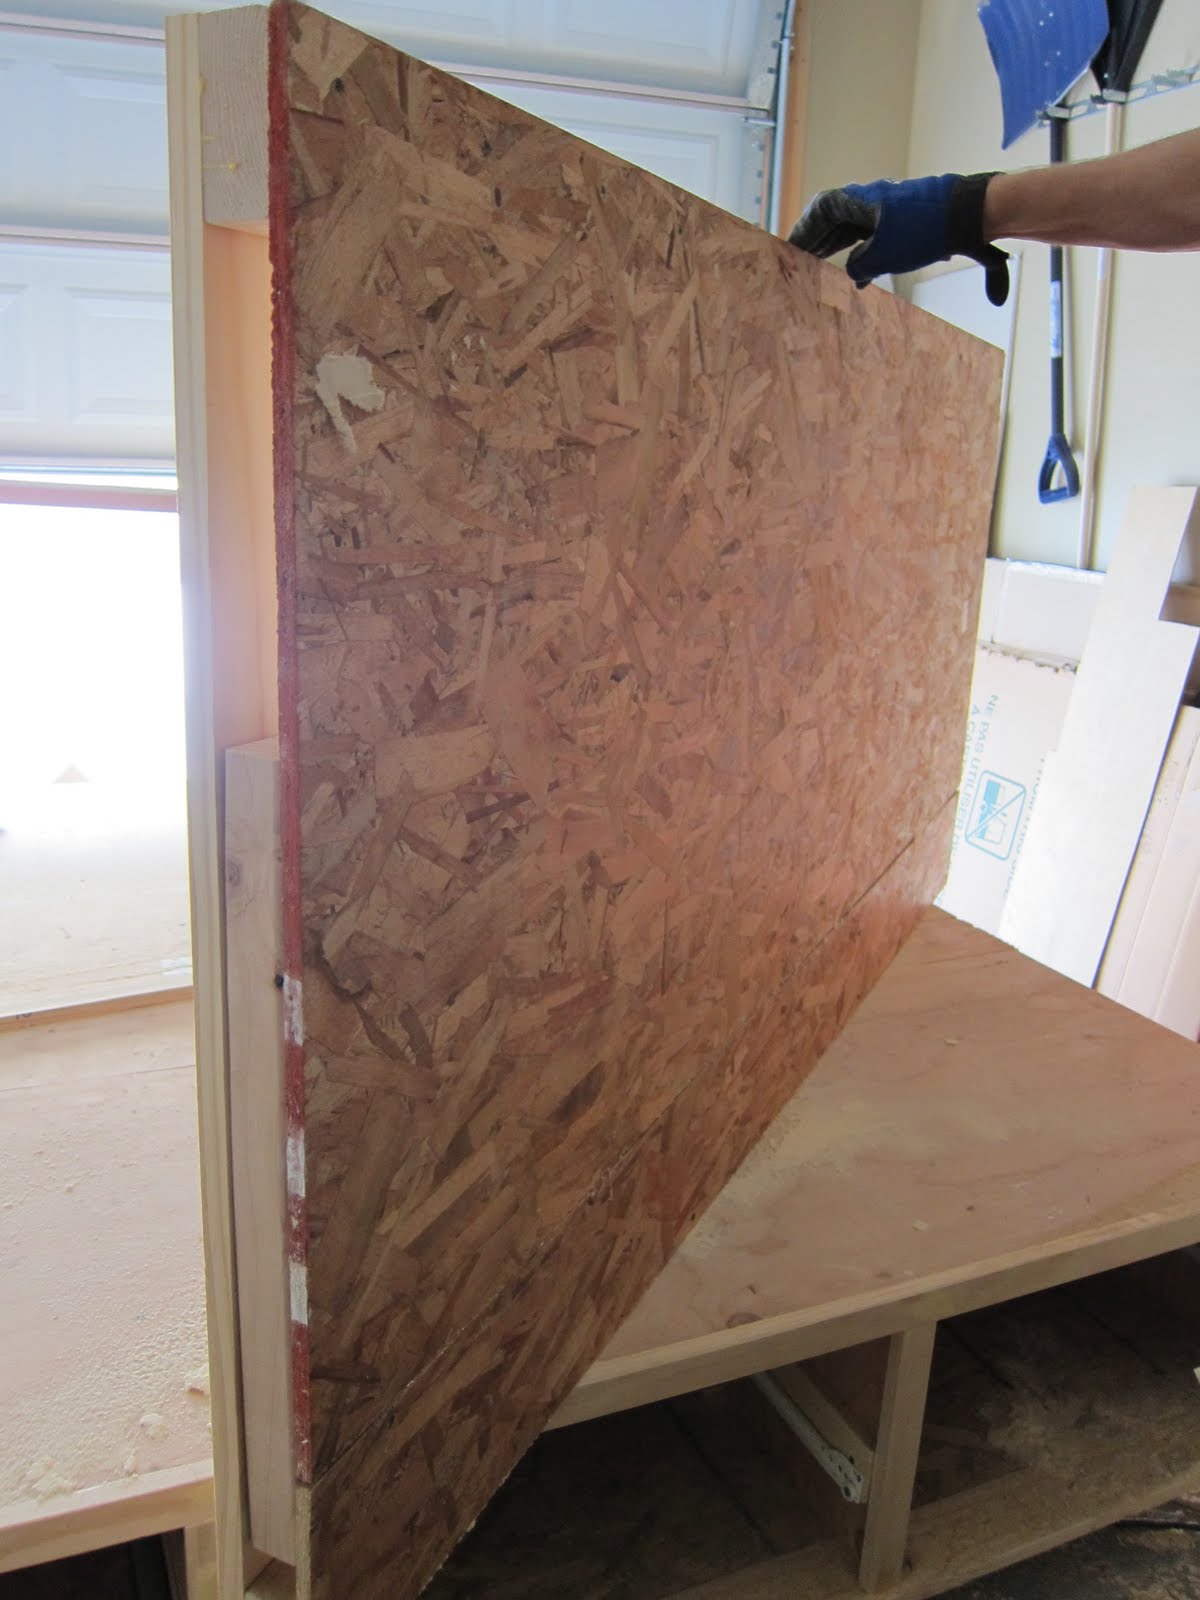
I started with a piece of 1/2" OSB for the back of the headboard, attached 2 x 4's to all four sides of the OSB (these can be scrap 2 x 4's), and then attached the front trim of the headboard to the 2 x 4's. This was the result.

Another view.
As I wanted my posts to be 3-1/2" x 3", I had to fabricate my own using 1 x 4 pine boards. Once the posts were built I secured them temporarily to the drawer receivers with bar clamps.


With the posts held in what would be their final vertical position, I could double-check that the middle section fit between the two posts. Also this ensured that the posts were plumb and were flush with the drawer receivers. I had Steph help me hold up the middle section of the headboard as I connected the posts.
 Next I cut out the feet. I didn't get a picture of the finished feet connected to the headboard but the concept is the same as with the footboard. That is, a 1 x 4 is sandwiched in between the foot and the headboard post to match the 1 x 4 at the bottom of the drawer receivers.
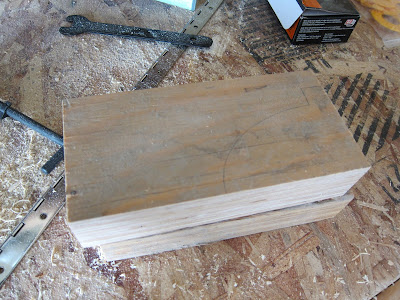
Next the padded insert for the headboard. I cut another piece of OSB to fit inside the front trim. This piece of OSB will rest on the 2 x 4's and be framed in by the front trim.

To finish the top of the headboard I used 3/4" trim and a 1 x 4. I increased the width dimension of the 1 x 4 by 1/4" using a piece of 1/4" rectangular trim. After nailing these pieces into place I used wood filler to smooth out the rough spots.

There was a gap between the 1 x 4 and the top of the posts so I filled that in with a piece of 3/4" square trim.

Back to the padded insert of the headboard. I drilled and cut out six elongated holes and placed 1 x 2's across the holes, allowing enough space on either side of the 1 x 2 to thread a rope through the hole.

Then, on the OSB that will be used for the insert I drilled 12 holes and threaded rope (in this case we used my old snowboarding boot laces...) as shown in the following picture.

After the laces were threaded, we wrapped the front side of the insert in batting and stapled it into place. The overall thickness of the batting is about 3/8".

View from the back.

Then came the fabric. We used some inexpensive curtains from Ikea for this.


Once the headboard was painted, we took the laces of the completed insert and threaded them through the holes and around the 1 x 2's of the headboard.


View of the back with the laces pulled through and tied to the 1 x 2's.

We tucked the excess lace back into the headboard.

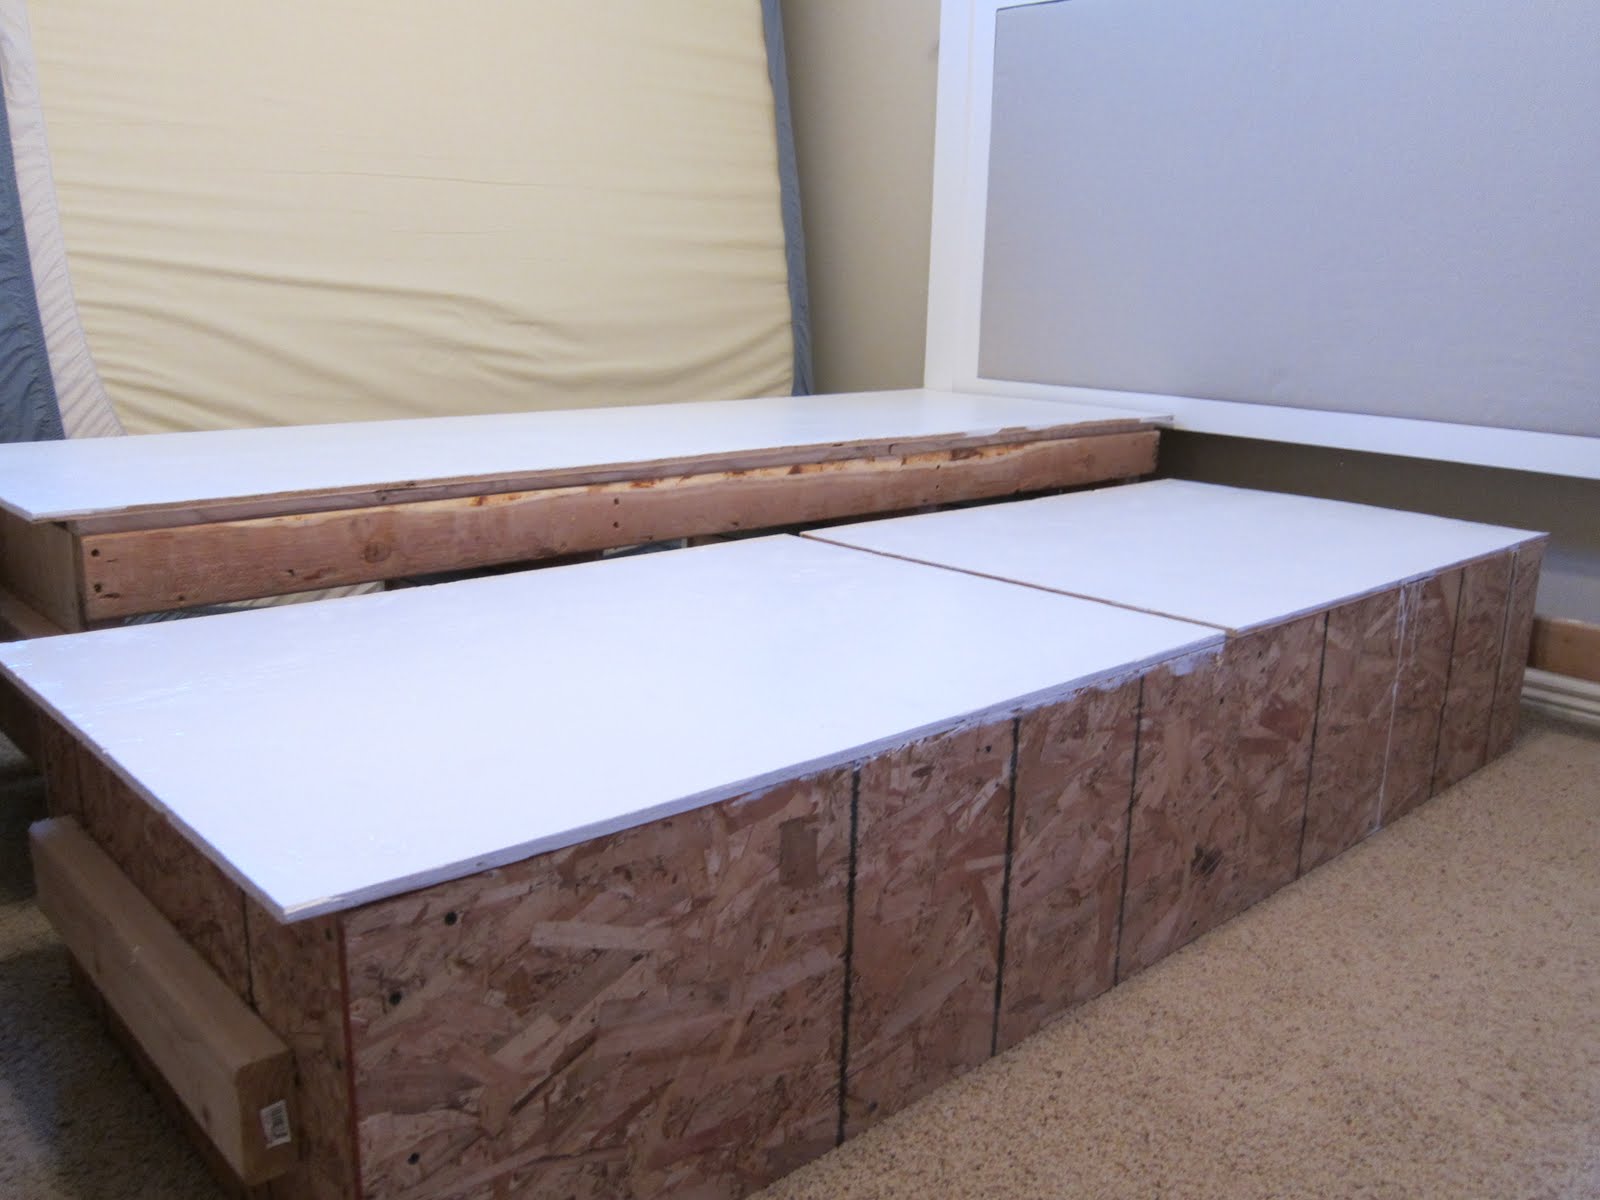
One thing I forgot to mention earlier is the way in which the headboard connects to the drawer receivers and storage compartment. I placed a 2 x 4 between the posts near the bottom of the headboard. The drawer receivers and storage compartment have 2 x 4's attached to each end which rest on the 2 x 4 of the headboard. I then used lag screws to secure the compartments to the 2 x 4 of the headboard.
We decided to leave the back looking like this since it will be against a wall. You could possibly use extra fabric to cover the back if you desire. The nice thing about this setup is that if you get bored with the fabric you chose for the headboard insert, all you have to do is untie the insert from the headboard, which you can then easily recover.

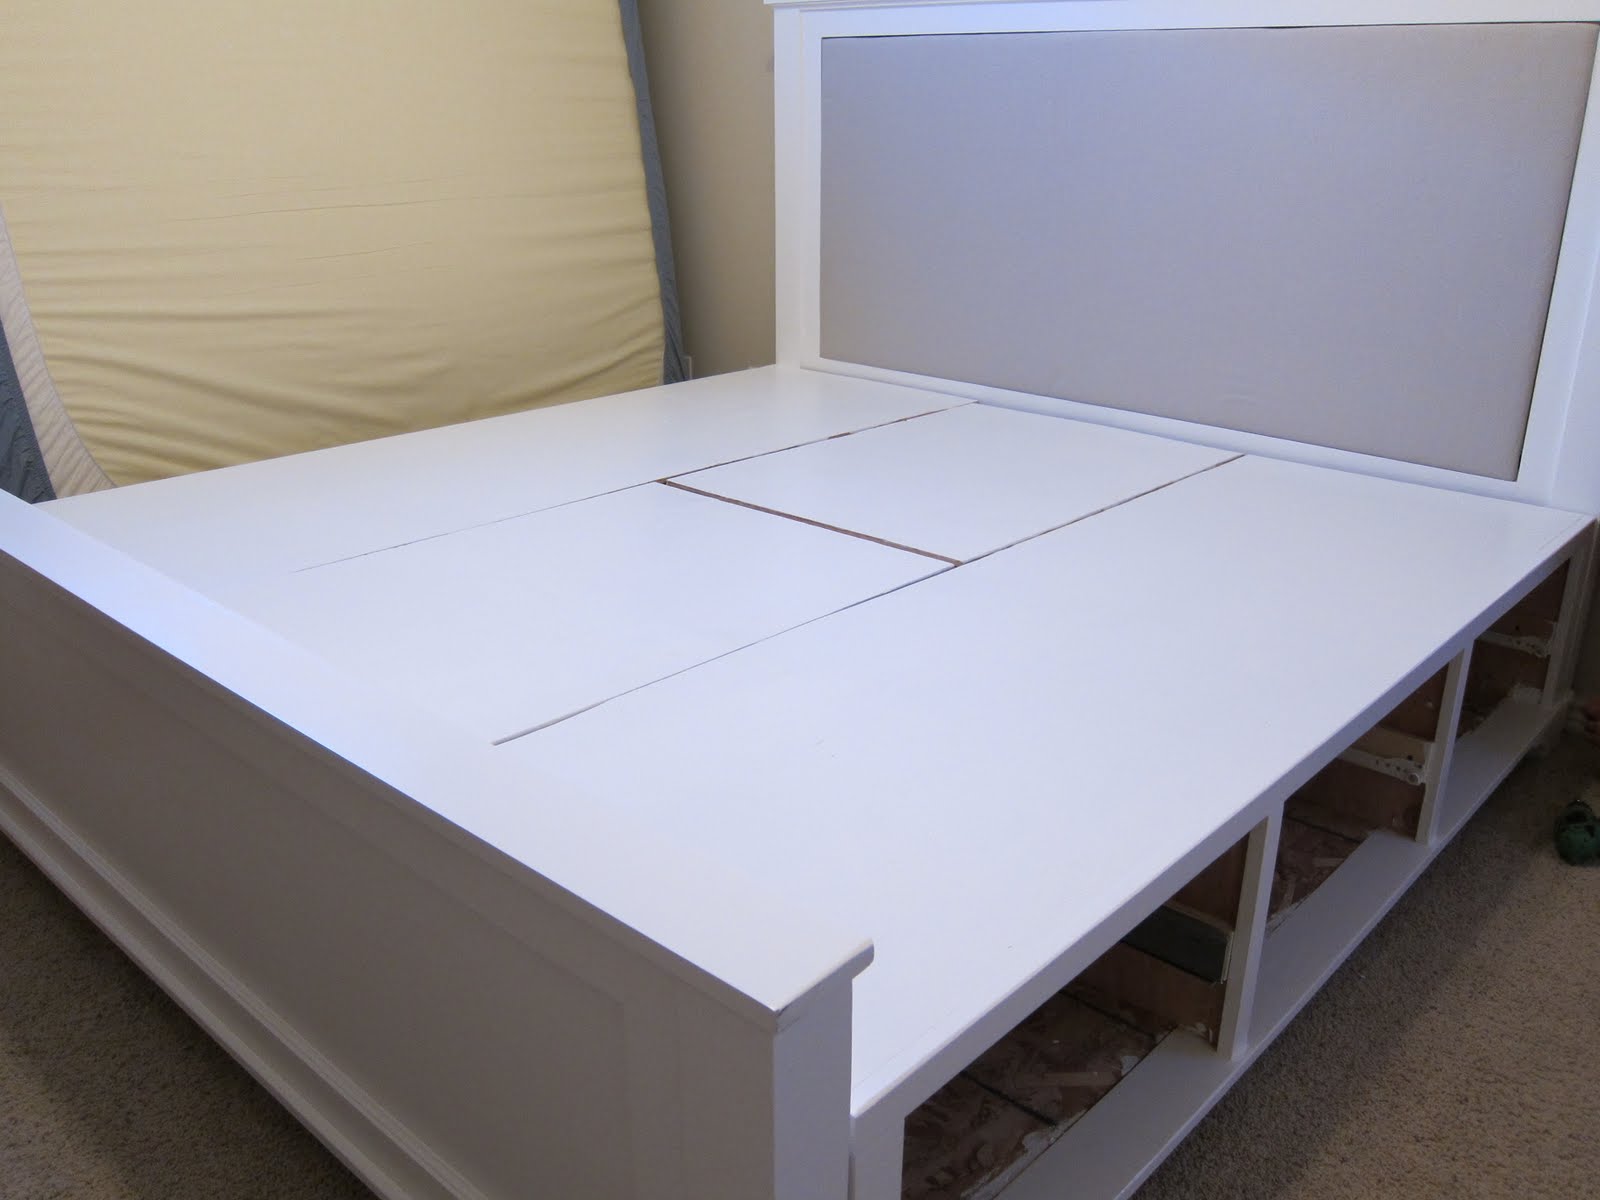
Here is a closeup of the finished product.

The overall dimensions of the headboard are 55" x 3" x 80".
I highly suggest that anyone who may attempt this project sketch out the bed and its components and create your own Cut/materials list. I am providing my list to be used as a "check."
Cut/materials list:
2 - 3" x 3-1/2" x 48-3/4" (post, glued pine boards)
2 - 3/4" x 2-1/2" x 36" (vertical trim on front of headboard, pine board)
2 - 3/4" x 2-1/2" x 68" (horizontal trim on front of headboard, pine board)
1 - 1/2" x 30-1/2" x 67-1/2" (headboard insert panel, OSB - thickness of OSB was actually 7/16)
2 - 1-1/2" x 3-1/2" x 73" (internal horizontal frame, 2 x 4 pine board)
2 - 1-1/2" x 3-1/2" x 29" (internal vertical frame, 2 x 4 pine board)
1 - 1/2" x 36" x 73" (back panel, OSB - thickness of OSB was actually 7/16)
1 - 3/4" x 3-3/4" x 81-7/8" ( top plate, pine board - I used pine 3-1/2 pine board and a 1/4 rectangular piece of pine to get the 3-3/4" dimension)
90" (approx.) - 3/4" x 3/4" (decorative top trim, any material type)
2 - 3/4" x 3" x3-1/2" (post bottom plate, pine board)
2 - 4" tall feet (any material)
Batting and fabric (enough to cover the headboard insert panel)
Wood screws, lag screws, washers (for the lag screws) and brad nails.
Painting and the final assembly:
We used three coats of paint and rolled it on with a foam roller. Once the paint was dried, we sealed the bed with three coats of polycrylic.


Here is the bed being assembled in its final resting place.
A shot of the feet and support blocks in action.

Finally, the finished product! Nightstand tutorial here!

Need to see the other posts for this bed? Click below.
Stephanie & Her Engineer Hubby