

DIY: How to Refinish Harwood Floors
8:30 AM
After much study, and a few quotes from companies telling us they could refinish our floors for somewhere around $1,500.00 (about $3.50 /sf), we decided to tackle the job ourselves to save some cash. It was probably one of the best decisions we made because it wasn't as difficult as we imagined and yes, it did save us a lot of cash. This project cost us about $370 total. We learned a few things along the way, so here we go.
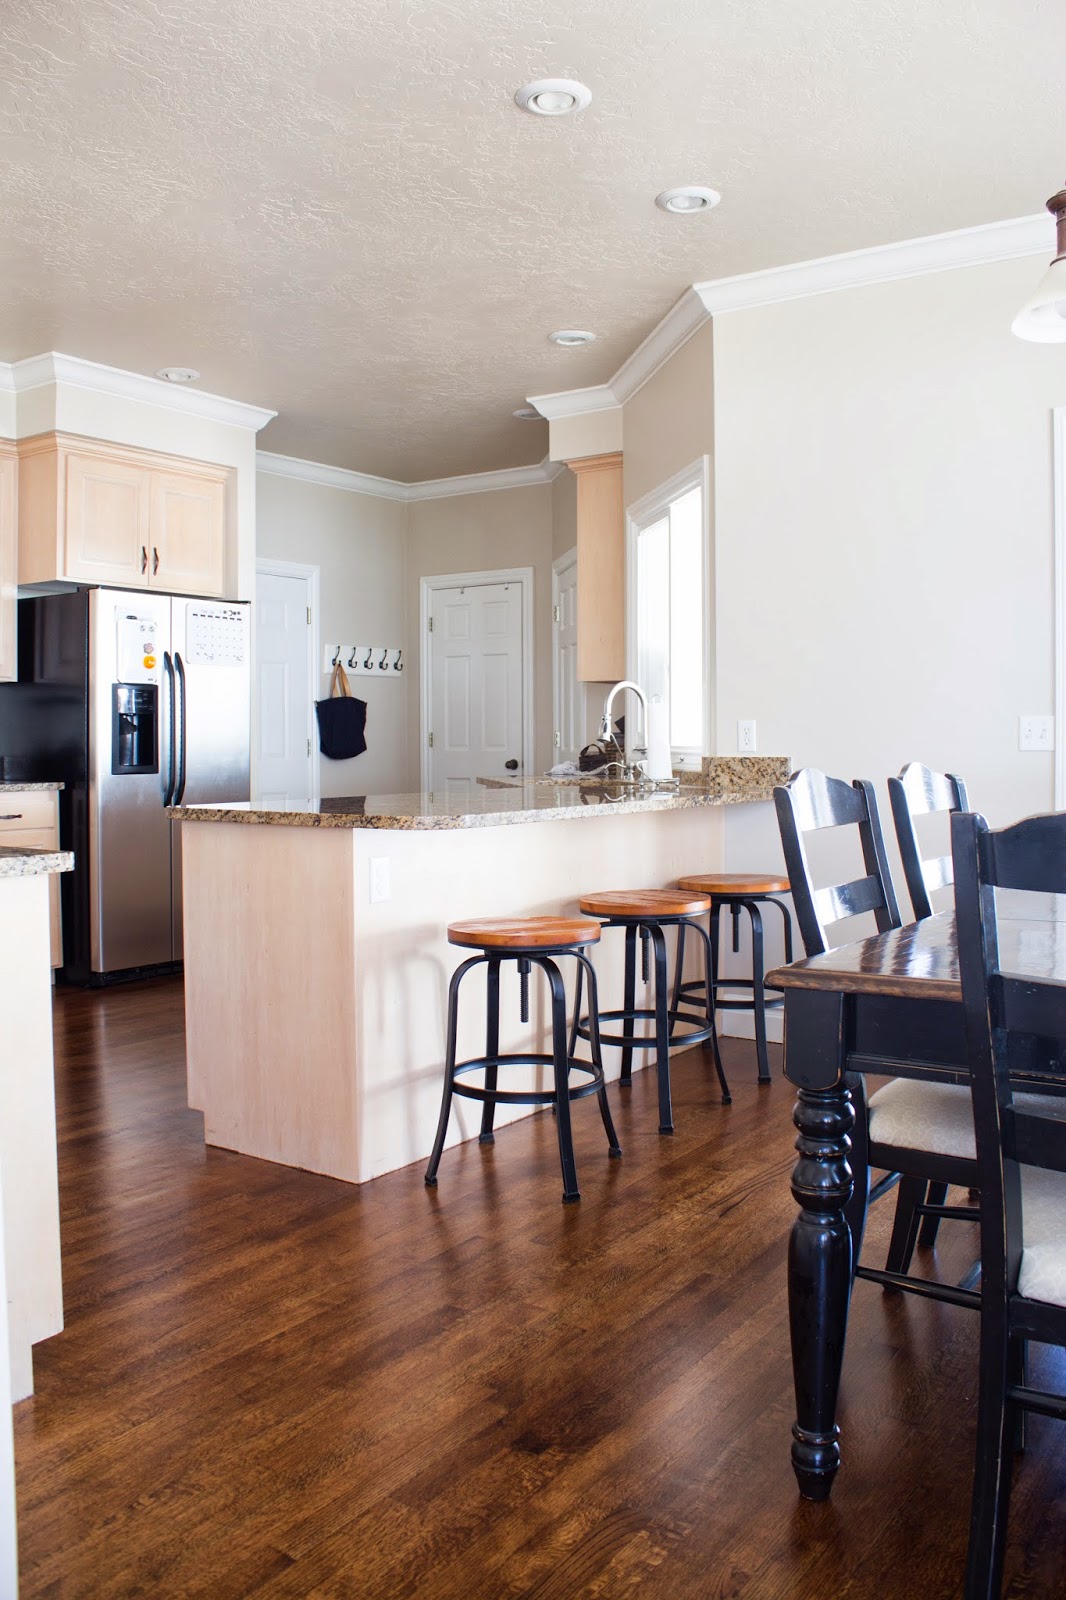
Before Pictures:


Supplies: Total cost - $370.
Floor Drum Sander with two sets of 36 grit, 60 grit, and 80 grit sand paper
Wood Filler
Putty Knife
Painters Tape
Ear Plugs
Masks
Safety Glasses
Painters Plastic
Stain (we chose Provincial from Minwax - oil based)
Polyurethane (we chose Parks Pro Finish satin gloss - oil based)
Natural Bristle Brush
Lambswool Applicator
Knee Pads
Mineral Spirits
Clean Rags
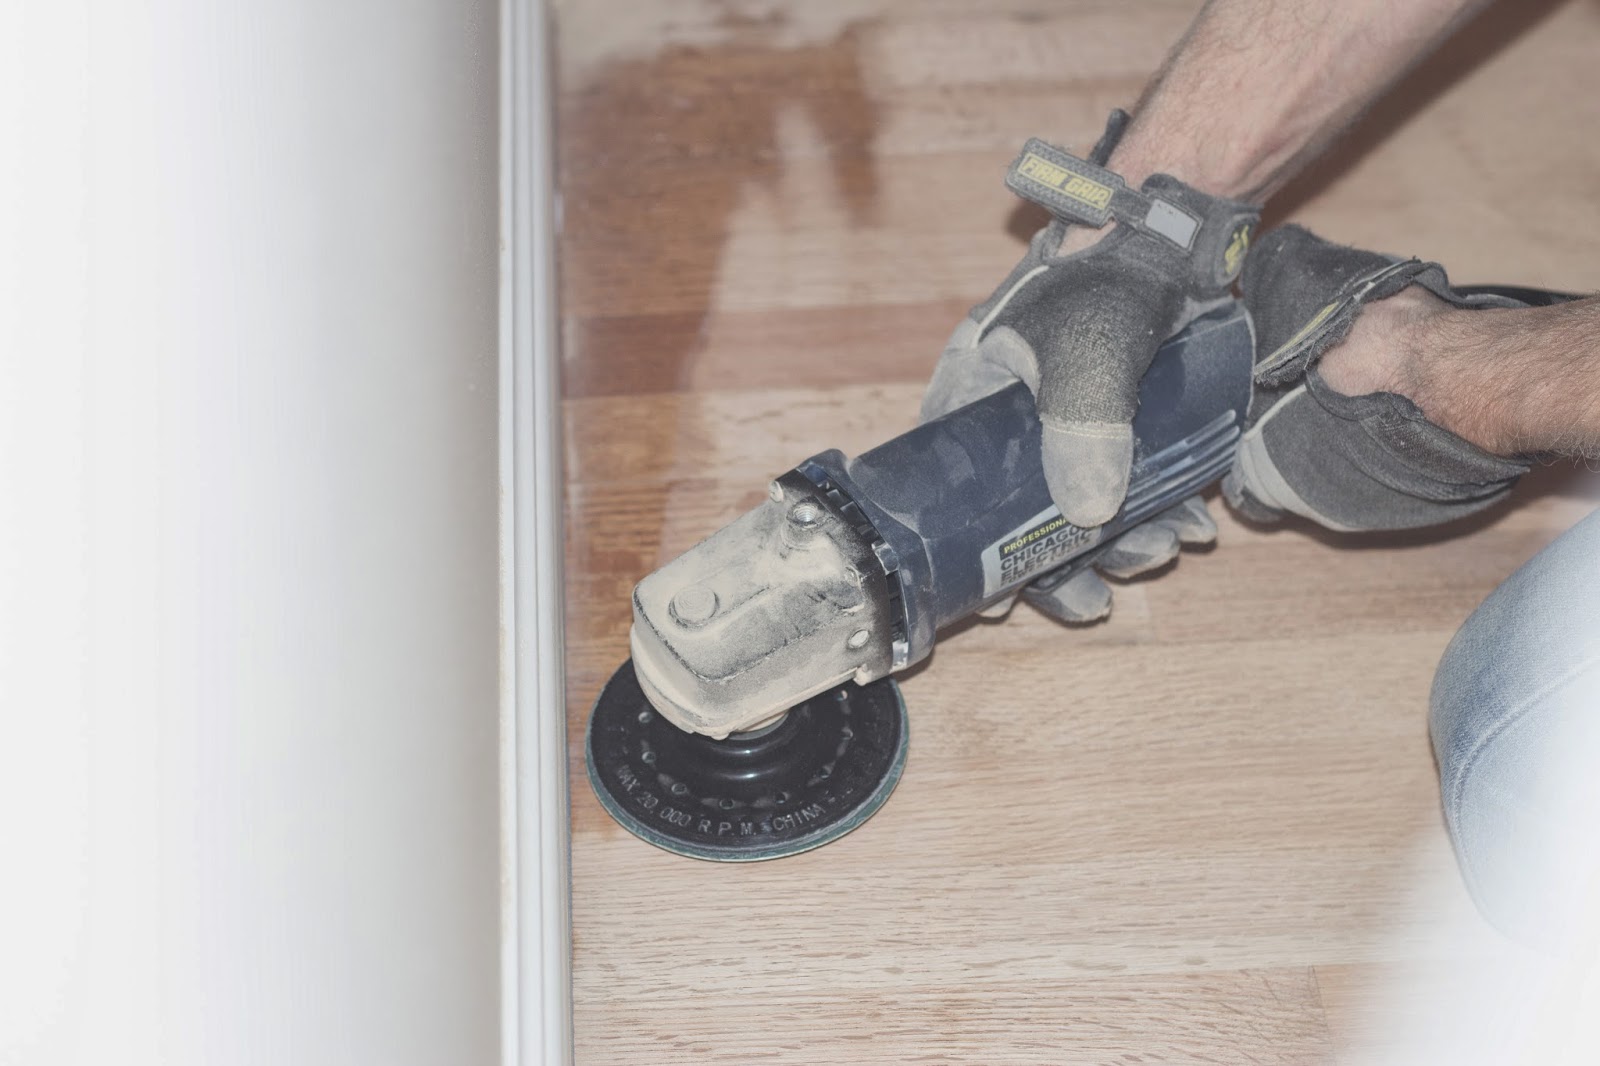
Tool options for detail sanding (use 60 or 80 grit sand paper):
Angle Grinder with backing pad
We started out with an orbital sander and then quickly realized it would take forever to sand our floors with this. We went back to Home Depot and rented a drum sander. The employee told us that 8 out of 10 people who rent an orbital sander come back and rent a drum sander. Save yourself the trouble and just get the drum sander. People avoid the drum sander out of fear that they will sand waves into their floors. We figured out how to avoid this mistake and we will get into soon.

Tape all your edges off carefully and hang plastic sheets wherever possible. Whatever you don't cover, you will have to clean later because of all the dust from sanding. We moved our table into our sunroom. Our fridge and oven went into the family room (sorta convenient when you want a glass of milk with your movie). We kept the dishwasher in place but removed the bottom cover so we could reach far under it.

How to sand hardwood floors with a drum sander:
- Sand along grain with 36 grit
- Vacuum
- Sand along grain with 60 grit
- Vacuum
- Sand along grain with 80 grit
- Vacuum
- Fill in holes and cracks with wood filler
- Sand along grain with 80 grit
- Vacuum
- Wipe up remaining dust with a rag and Mineral Spirits or paint thinner
To avoid bumps in the floor with a drum sander, follow a few simple steps. The sanding drum is constantly rotating whether in the raised position or lowered position. So, the trick is to be in forward or backward motion whenever the drum is in contact with the floor. This means that every time you raise or lower the drum, first make sure the machine is already moving in the direction of sanding. Also, remember to course-correct only when the sanding drum is in its raised position; this will help you keep the machine balanced and avoid uneven sanding. Here is a helpful video.

How to sand under toe kick, along edges, and in corners:
With the center of the floors sanded, we just have to sand the detail areas such as corners or under cabinet toe kicks. You can rent an edger that is made specifically for the edges and toe kicks, or you can try any of the detail sanding tool options we mentioned above. We chose the angle grinder because it was very fast and it fit perfectly under the toe kicks. Keep in mind that with an angle grinder, the following can happen: uneven sanding, swirl marks, burn marks if you don't change pads often, and lots of dust. However, for us it worked out really well. We practiced sanding techniques in an unnoticeable area and discovered that swift sanding strokes with the grinder at a slight angle worked best. Using this grinder saved us a lot of time and money.
First coat of stain. Spread it evenly and go with the grain or else you will have to sand it again (we had some trouble and had to sand things down again). Use two people when staining. The first person applies the stain, the second wipes up the excess. Read the back of the can for more directions.
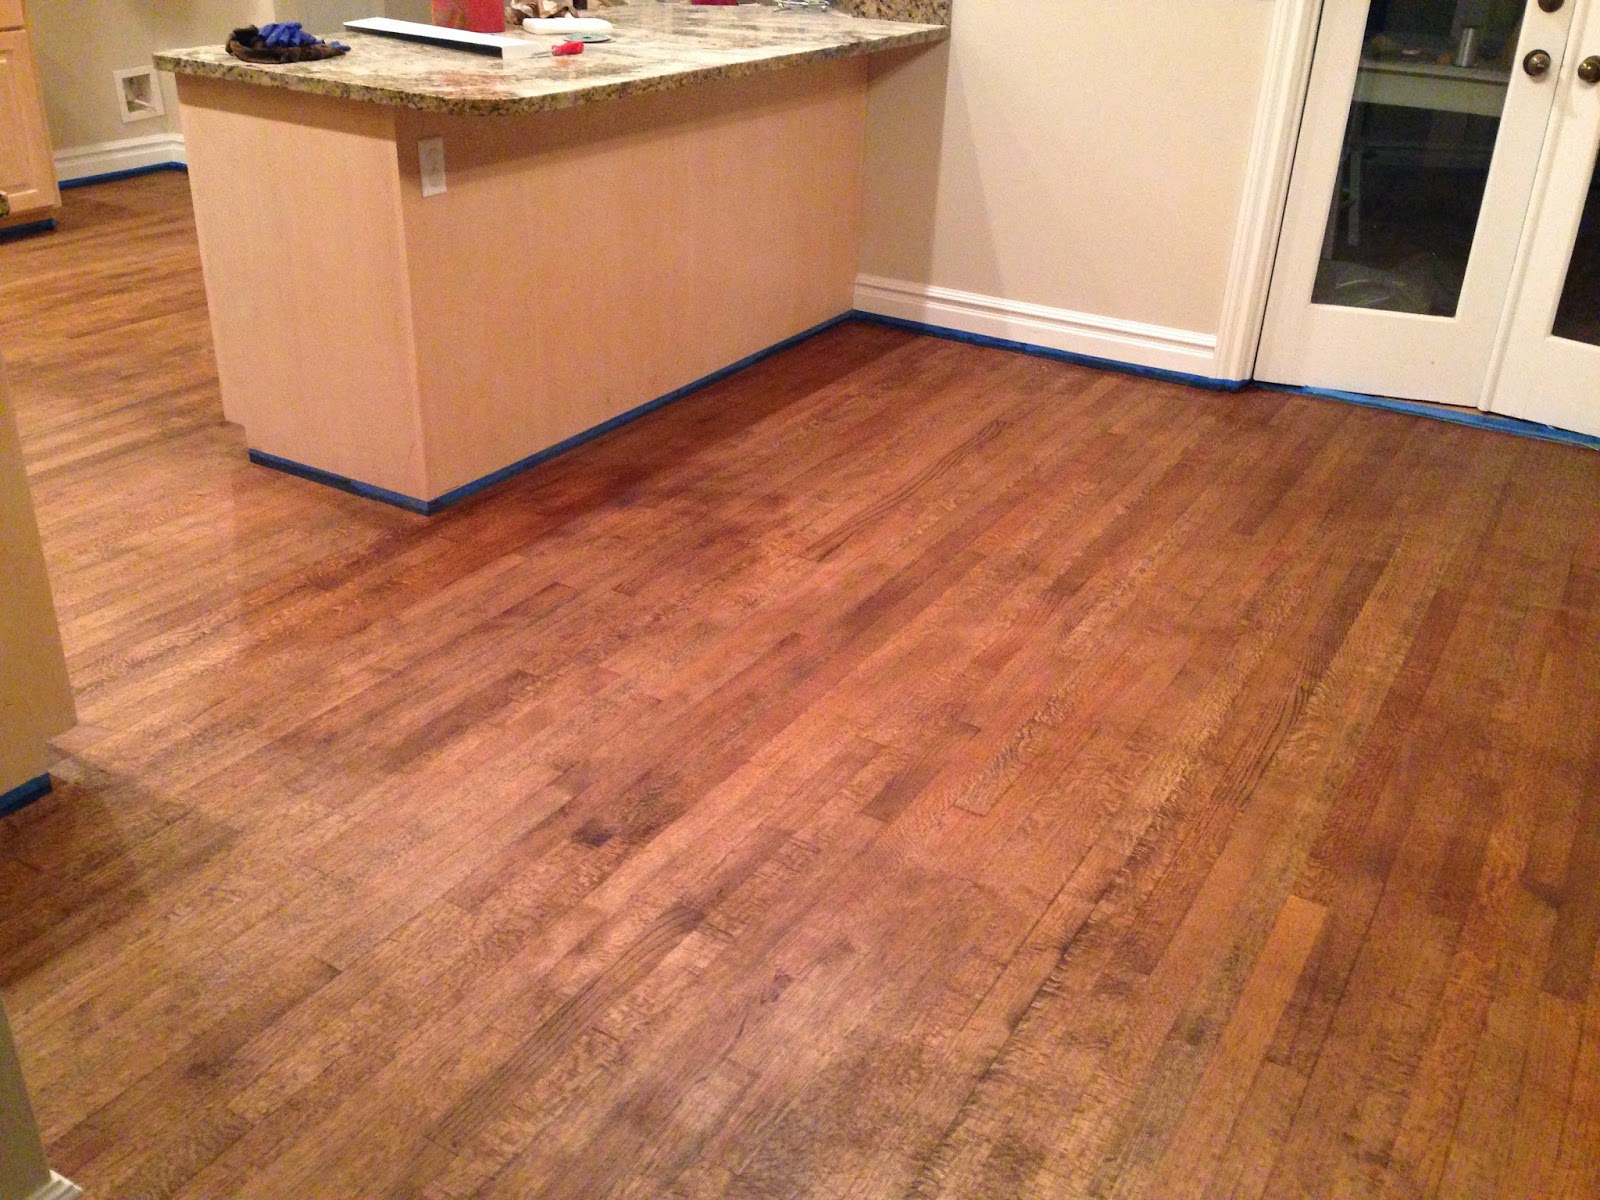
Second coat of stain for a darker color.

It was a miracle we could walk on the kitchen floor briefly to load some dishes in the dishwasher.

Apply the first coat of polyurethane. Keep it thin and apply with the grain. Use a natural bristle brush around the edges and use the lambs wool for the center. Avoid stirring or working the polyurethane too much as bubbles may form. Follow the directions on the back of the can.

Lightly sand the first coat down according to the directions on the can. We used 120 grit sandpaper.

Wipe up the dust with mineral spirits.

Apply the second coat of polyurethane. We worked at night so everything could dry in our sleep. We had the windows open and fans going to keep the air fresh.

All done! I love my floors now! They actually feel clean and they look amazing. Next up, cabinets (maybe)!


-Steph


2 comments
The change is dramatic but fabulous! We're looking to rip up carpet in our bedroom, which had hard wood floors underneath. Do you have any advice for first time sanding and staining? (When it hasn't been done before).
ReplyDeleteThis post was very helpful, because I've been wanting to refinish the floors in our sunroom too!
Floors look great,what color stain again?? Also what color did you paint that bannister i see in one of pictures. thanks
ReplyDelete