

DIY: Reupholster An Old La-Z-Boy Recliner
12:12 PM**All images are property of Do It Yourself Divas. Please do not use without permission. You are welcome to pin. **
DIY
Reupholster an old lazy boy recliner
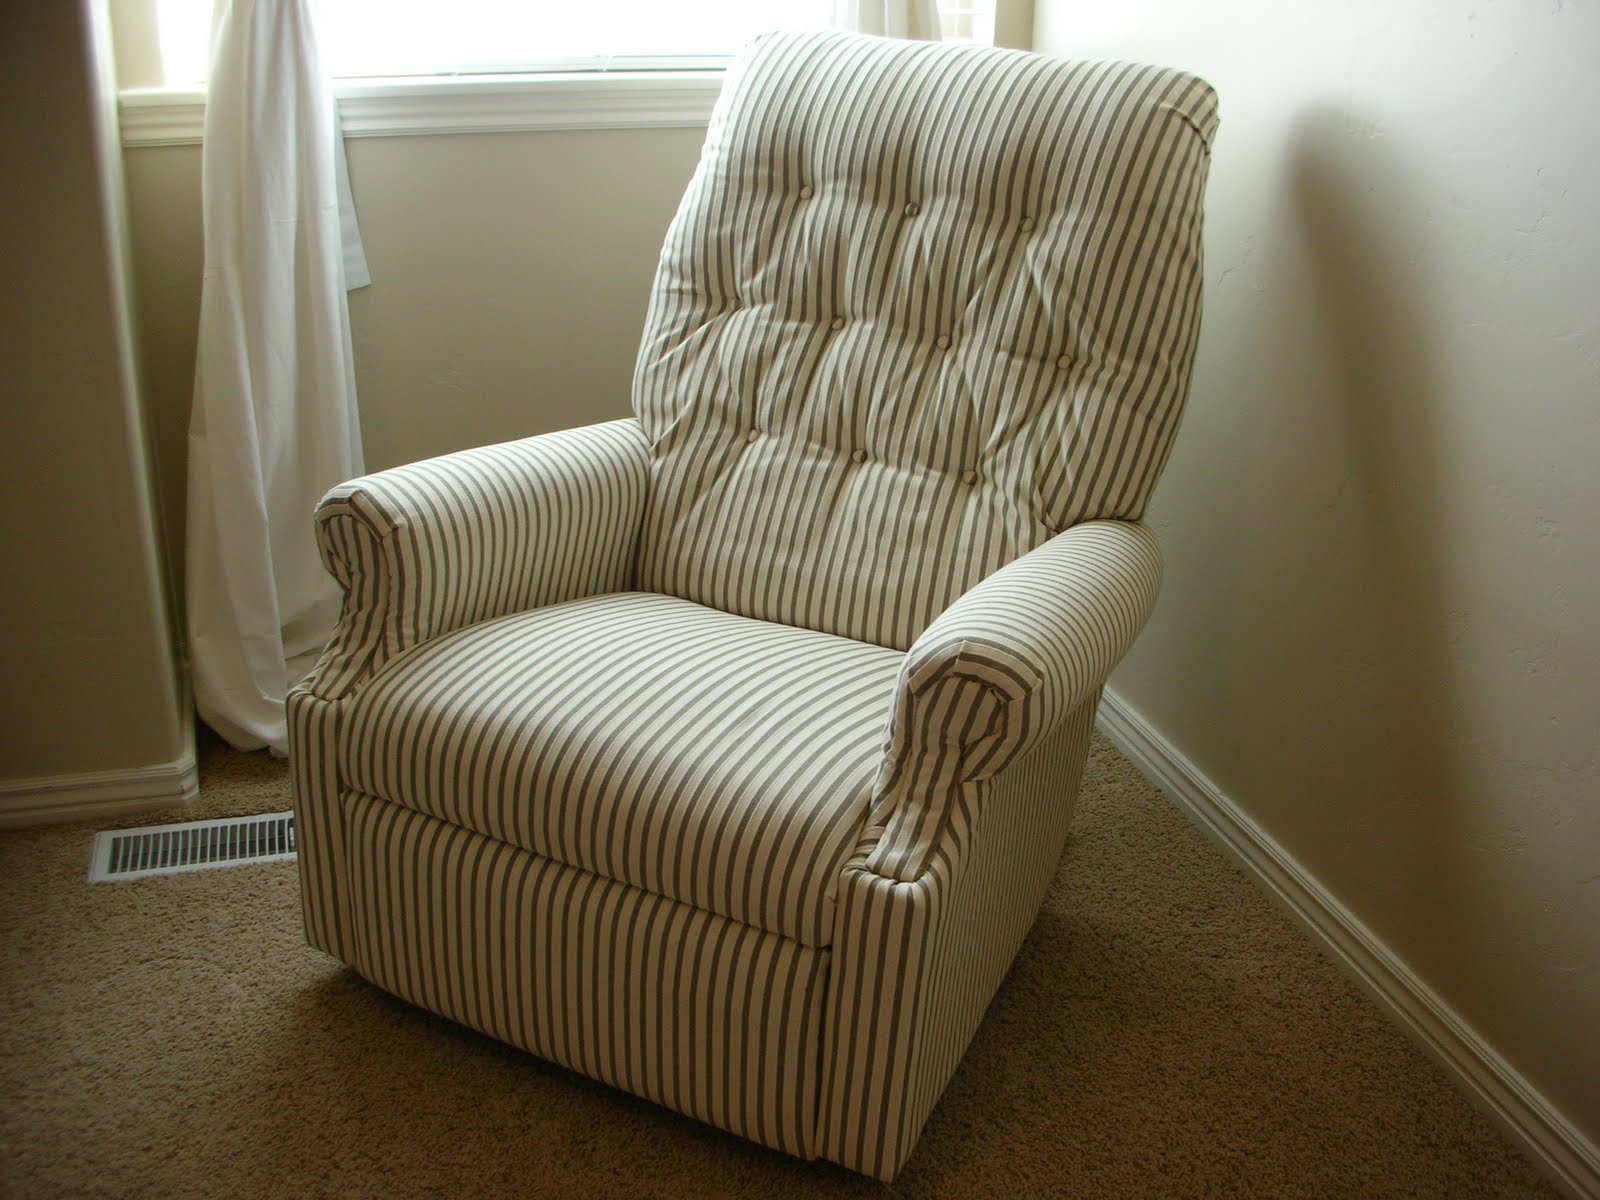
Here it is before

After!

Total Price: $40
This old sucker has been in my family for years; in fact I think it is as old as I am. This was the first reupholstering project I have ever done and I did it because I am nesting and I have to get the baby's room done! After searching on KSL.com for months without finding anything, and not wanting to spend hundreds of dollars on a brand new rocking chair, I decided to ask my parents if I could have their old La-Z-Boy recliner. My husband and I got to work right away.
Since every chair is different, I can't really say how you can reupholster your very own chair, but this is basically what we did.
Step 1: Take the chair apart! It is helpful to have a handyman around if this is not your thing. Make sure you keep all hardware. You would not believe what I found inside this chair. Clumps of dust, sunflower seeds, and yes, a butter knife.
Step 2: Measure all parts covered in fabric and estimate how much fabric you need. Add extra fabric for seam allowances, or in other words, staple allowances. No sewing required. :) I used about 5 yards of very wide upholstery fabric.

Step 3: Rip off old fabric and cover with new fabric! Or you could even cover the old fabric with new fabric. I cut squares of fabric that cover the area of the piece I was working on and went at it. This takes a lot of tugging, pulling, folding and stapling. (Note to self and those reading: An electric stapler would be awesome for the next project. )I even used a hot glue gun to attach the fabric to the cardboard pieces. I didn't realize just how much cardboard was used to make this recliner until I gutted it. You would be surprised at how easy it is to just follow what the manufacturer did. Once the chair is in pieces, it is clear to see how the chair was upholstered in the first place.

Step 4: The hardest part about this particular chair were these buttons. I bought hardware called Cover Button Refill. This allowed me to use the same fabric as the rest of the chair for my buttons. The hard part was putting the buttons on the chair. It would have been nice to have a super extra long needle with a very wide eye to string these buttons on, but we didn't have one and I don't even know if they exist, so we got creative. We used a long skinny screwdriver to stab through the thick chair. We then taped the button parts onto the screwdriver and pulled it back through to the back of the chair and into place. Hard work! If there is an easier way, I would love to know.

Step 5: Once you have everything covered, put it back together. What do you think? Since this was my first reupholstering project, I would have to say that I am satisfied. This chair even has moving parts and it still worked out. :)

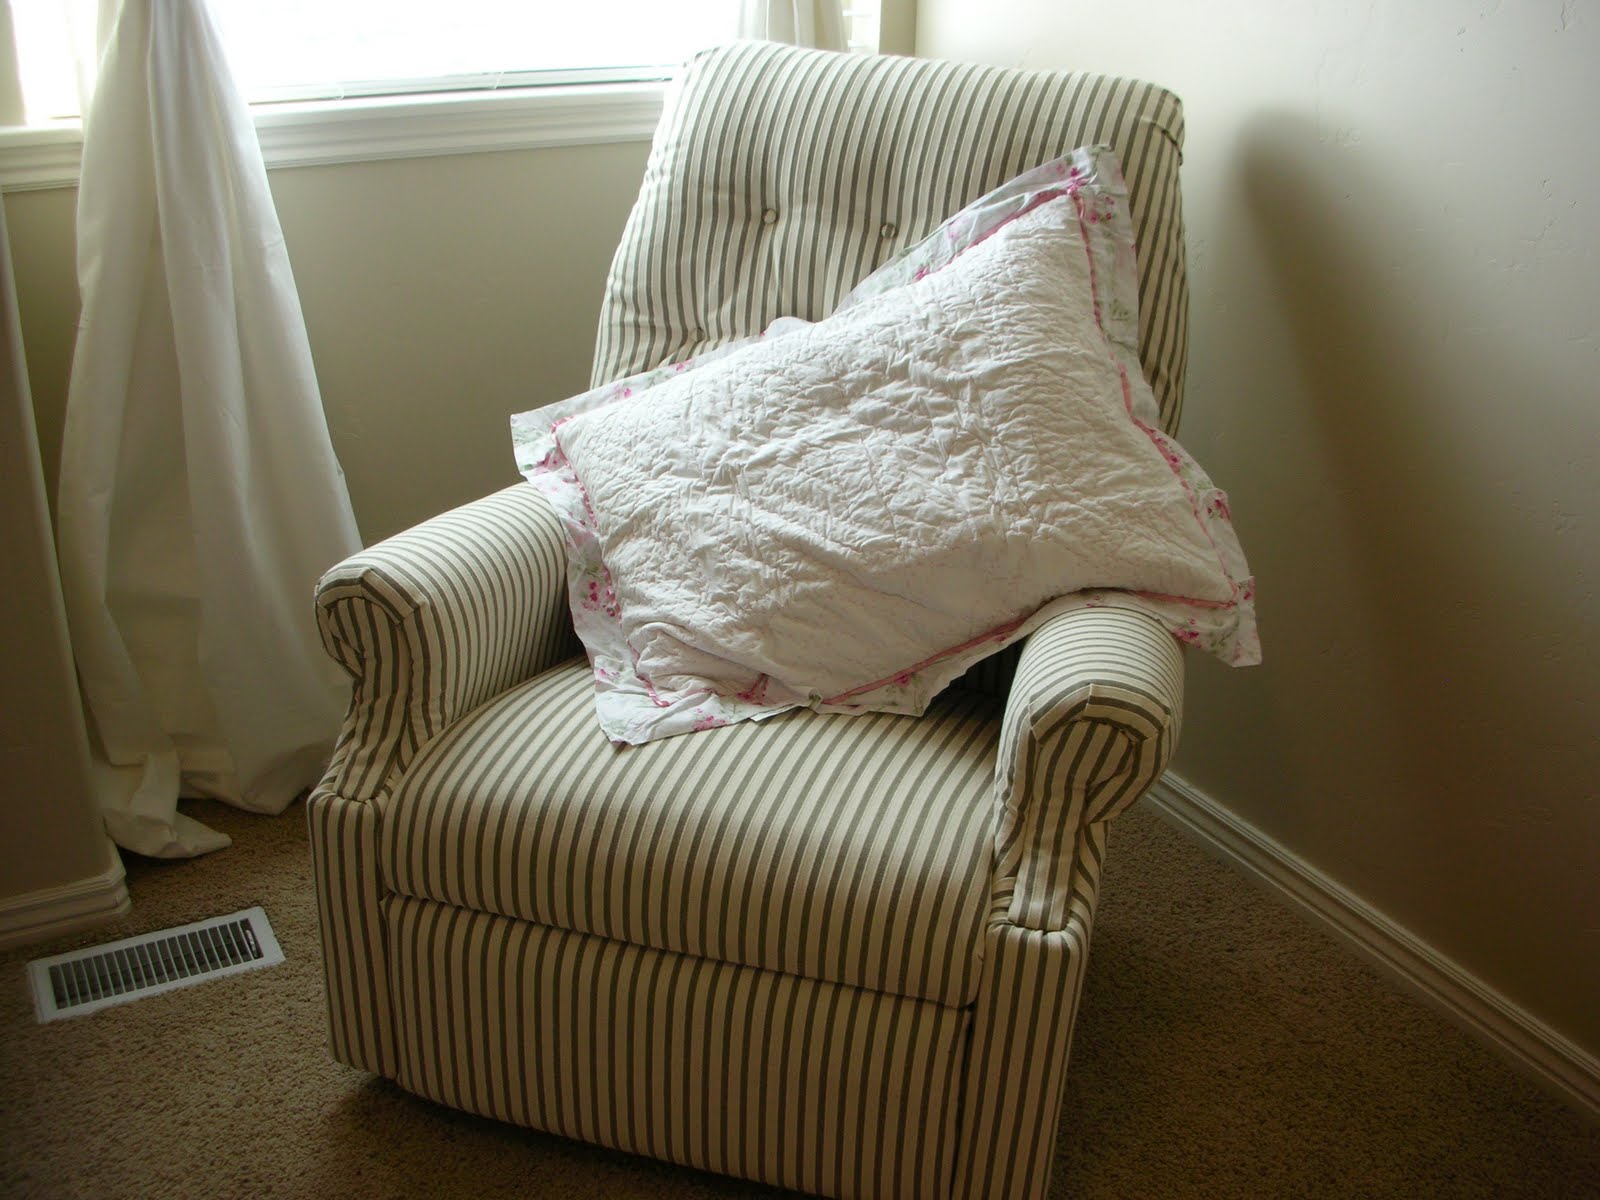
And if your not completely happy with the way it turned out, add a pillow. It may add a little something and make you feel all better. So have no fear with your reupholstering project. Hack away at that old Lazy Boy chair and create a beautiful new one.
Stephanie


60 comments
You guys really are crafty! I think I'm going to cover my not so old but not so cute Wal Mart type rocking chair with some cuter fabric. I'm excited!
ReplyDeleteway to go steph!!! what a project! It turned out great!!!
ReplyDeleteSteph! that looks awesome! i wish i had your talents.... i always read this blog to see what your creative self is up to and it gives me some motivation to do things around my house!
ReplyDeleteYour blog is always so full of fresh, ideas and great tutorials. I have selected it for a lovely award. Congrats! Check my blog for details :)
ReplyDeleteThank you for sharing your skill and excitement. I am ready to have-at my old swivel Lazy-Boy lady's size recliner. It is a cute style but the worn out olive-green color has to go! Jeanne
ReplyDeleteThis is awesome! My husband & I are thinking about doing this. We have a comfy recliner that DESPERATELY needs a makeover. Kinda scary, but doable, I think. Thanks for sharing!
ReplyDeleteYou posted exactly what I need. My chair looks like it has had it last ounce of use but it still loves me and me it. I shutter at the thought I have to be without it for a day. But your pictures, your chair and your enthusiasm gives me no choice. I was scared, but now I am excited. It sure couldn't look any worse and I am tired of the offers of my family to buy me a new one. Thank you so much!
ReplyDeleteWonderfull job that you did ! Your Enthusiasm is highly infectious !!
ReplyDeleteI too have an old lazy boy recliner that I want reupholstered and despite that I am the DIY tipe, somehow I didn't think about doing it myself.
But you are so enthusiastic about it, I couldn’t help being intrigued. You are so keen to share what you know, I can’t resist the urge to join in.
Thank you very much!
Wow! You're amazing! I too have a baby on the way and an old recliner I would love to re-purpose. I've been so depressed looking through at websites with all these fab baby room designs I could never afford. It never occured to me to just revamp our old stuff for baby. I have a new hope now - thanks for taking the time to post this!
ReplyDeleteYou did an awesome job. I have a 7 year old UGLY recliner I want to recover, and what inspiration is in this post. Thank you! Linking to it.
ReplyDeleteawesome! brave!
ReplyDeleteThanks for the info......I have a 8 year old recliner that I am going to cover.....
ReplyDeleteWould the tool used to repair the lacing on baseball gloves be long enough to thread the buttons? They are available at sporting goods stores.
ReplyDeleteI haven't seen a lacing baseball glove tool before but I believe that more fabric stores are carrying the reupholstering tools you need for this project. I would just call around and tell them about this project and see what they have that could help you. There is a specific tool out there that is designed for this typed of work but I don't know the name of it and I have never used it. Good luck, and maybe the baseball glove tool will work for you. I'd love to hear how it turns out.
ReplyDeleteDownright inspirational. You're showing it really can be done! I am now making like the little engine, "I think I can. I think I can. I think I can."
ReplyDeletewow! amazing!!
ReplyDelete<3xojo
Great job! I've been thinking of reupholstering something and you may have given me the ambition! I came over from Pinterest!
ReplyDeleteWe have this exact same La-Z-Boy in desperate need of reupholstering so we can use it for a rocker for our baby... I've been wanting to do it for ages but you have given the courage and the know-how... thanks!
ReplyDeletego to any walmart fabric dept or fabric store. buy a package of needles that has the upholstry needle in it. long big eye. also curved big eye.
ReplyDeleteyour chair looks great. I tried when I ws about your age. didnt work so well. congrats.
It looks great! I upholstered one too but did it in stages so it could be used while being covered. First, the footrest (easy) then the seat (not so easy). Then one side, so I could use other side as a guide to putting it back together. I also took pictures of the parts before disassembling. For amount of fabric I used a guide found online. My chair didn't come apart easy and some parts were glued so I had to be creative. It took me 3 years.
ReplyDeleteMy husband lives in terror that I will throw out his old la-z-boy which I would never do (unless I thought I could get away with it of course... it's so ugly). This is a lovely compromise: he gets to keep "old reliable" and I don't have to put up with a hideous chair that matches NOTHING in my beautiful living room! Bonus: this chair has been our faithful hound's napping place for 7 years, she'll get to keep her comfy spot too. Now, where's that staple gun.....?
ReplyDeleteYou've given me the hope that one day I can reupholster my reclner. Mine has a few more extra's on it then yours - but after reading your article (great pics) - I started to look at my chair more closely. I've already reupholstered my 25' sailboat cushions - which was daunting to say the least - so I think with patience - I can do this! Hope your little one is doing well!
ReplyDeleteGreat project! Thanks! Calico corners just quoted me $640 to have them reupholster! I think I might just try to tackle my super comfy LaZBoy myself. Thanks for the good photos too!
ReplyDeleteRay - near Baltimore,
ReplyDeleteBravo Stephanie! Before knowing about you and your inspirational Webb site I sent our old Lazboy (with a seat that had bottomed out and lost all of its "cush") off to the local upholsterer to have the seat repaired. The guy came looked at it, told me what was wrong, described the repair, quoted what I thought was a reasonable price, and picked the chair up (which I thought was an accomplishment but he was REALY BIG) and four days later returned the good old lazboy. It now sits about 3+inches higher and has its "cush" restored. I wish I had known about your "how to redo a Lazboy". I'd have been at least $200 wealthier. C'est la vie.
awesome! and my dad just asked if i would recover his recliner. he was joking but now that i happened across this, i might just give it a try. love the pictures, makes things helpful as well.
ReplyDelete-michelle
Wow!! I am a new follower and always wanted to try and upholster a chair. Was about to buy one in local thrift store for $5. Wish I bought it to try this which I am going to do.
ReplyDeleteThanks for the tip
Great tutorial and a lot easier sounding than doing a slipcover. A word of caution about upholstering over old fabric. If there are stains on the old fabric, particularly from grease, eventually it will seep up into your new fabric and make a stain there too.
ReplyDeleteI LOVE you! My chairs are as old as my youngest, ie. 17 yrs. I was just pricing an upholsterer, and Yikes! Now I have the courage to go for it ourselves.
ReplyDeleteGreat job and very brave of you to use stripes! Mine would have been just a smidge off and it would bother me forever. I also recently recovered a recliner and I have a suggestion for anyone who wants to try to do the same: As you disassemble the chair, take photographs of the hardware as you go-We have a rocker/recliner with wooden arms and some of the hardware looked like it was engineered by martians! It made sense at the time we took it apart, but I had to delay my work for about a week and by the time I put it all back together, I couldn't figure out how to put the backrest back on correctly! Luckily, after several attempts, we got it back together, but photos would have made it so much easier. By the way, we also found some rather interesting items inside our chair, especially with cats!
ReplyDeleteGreat idea, just what I was looking for! don't forget that some older recliners were recalled for not having a safety bar and children have been caught and injured, so keep an eye on the little ones! Thanks again!
ReplyDeleteWow! Amazing! Great job. I've upholstered a chair before & I know what hard work it is. They do may big needles for upholtery.
ReplyDeleteThis may be a stupid question, but did you wash your fabric first?
ReplyDeleteWOW what an awesome effort, you certainly are crafty. Unfortunately I'm not that handy with a the sewing machine so had to settle for one of these Lazy Boy Sofa Slip Covers
ReplyDeleteInspiring! I might have to have a go at my old recliner couch now!
ReplyDeleteLove your post. We have the most comfortable black leather recliners BUT so ugly. I'm thinking I could make linen type slip covers. Your post has inspired me. Thanks - Sarah from 1pastorswife.wordpress.com
ReplyDeleteHow did you get the reclining lever off
ReplyDeleteThank you so much for posting this! I have the EXACT same chair but in a super ugly and old tweed fabric. My cats have totally destroyed it so I want to recover it. I can't thank you enough for putting this up with such clear pictures and easy instructions!
ReplyDeleteCouldn't see buying a new Lazy Boy recliner when the only thing wrong was the worn fabric. You helped me to decide to reupholster the chair. Thank you.
ReplyDeleteI also have almost the exact same chair that my cats have destroyed. It was my grandfather's and I didn't want to get rid of it. I am so happy to have found your site. I am going to give reupholstery a try and hopefully it turns out as nice as yours did.
ReplyDeletethis is so helpful; thank you. The most helpful part to me was the advice to take the chair to pieces...didn't think of that; have simply been measuring and sighing. Thanks again from Lisa
ReplyDeletefound you while googling reupholster a lazyboy and I love that fabric! where did you find it? Also, how long did it take, approximately, to complete this project from start to finish?
ReplyDeleteI am SO excited about this!! I have the exact same chair and my hubby loves it. It looks so disgusting, I can't wait to let him know the compromise... ;)
ReplyDeleteStephanie, how is the chair holding up? Did you find it difficult to put it back together?
Thanks so much.
Awesome job! but I too am wondering: How did you get the reclining lever off?
ReplyDeleteMaybe this is the answer for the handle: http://www.ehow.com/how_12021137_change-handle-lazboy-recliner.html
ReplyDeleteYou guys really are crafty! I think I'm going to cover my not so old but not so cute Wal Mart type rocking chair with some cuter fabric. I'm excited!
ReplyDeleteMy husband and I have been working to give our home a face lift - new paint, window treatments, and rugs - but I haven't been able to figure out how to fit our old recliner into the new color scheme. Your post provides the direction and encouragement to recover it. Thank you, and congratulations to you and your husband on your new little one.
ReplyDeleteVery helpful. I've purchased fabric to re-do my husband's Lazy Boy with ottoman--albeit an updated version of the older model you did here. It was good to see you took it apart as you did. I've been looking at how that happens. Eyeing up the fabric yardage was not that difficult, but unhinging it may be.
ReplyDeleteI'm making a "happy chair" type job out of it with different fabrics in similar and opposing colors: flowers, stripes and solids. It's my first time as well. Wish me luck!
Very helpful. I've purchased fabric to re-do my husband's Lazy Boy with ottoman--albeit an updated version of the older model you did here. It was good to see you took it apart as you did. I've been looking at how that happens. Eyeing up the fabric yardage was not that difficult, but unhinging it may be.
ReplyDeleteI'm making a "happy chair" type job out of it with different fabrics in similar and opposing colors: flowers, stripes and solids. It's my first time as well. Wish me luck!
I have two (2) recliners that look almost identical to yours ( the style ). They don't match my sofa. Yours is a great way. Believe me, I am not an experienced reupholster. I did do my dining room chairs. But, my question is this; I'm a little confused on how you got those buttons on. I really don't understand how you did it. And I will have to do all of this by myself. Hopefully, someone can tell me an easier way to do the buttons.
ReplyDeleteHas anyone come up with an easier way to do the buttons??
ReplyDeleteThis is what I remember from growing up in my grandmothers upholstery shop - buttons. Supplies: Button covering kit - should have a holder for the button head, a back attaching apparatus and new metal backs; new fabric to cover buttons; thick thread (note thickness of old thread when you remove the buttons; 1 large eyed long needle
ReplyDelete1) Remove the buttons and pop off old backs
2) Cut squares of new fabric about 1/2-3/4 inch bigger than button head - how big depends on thickness of button.
3) Follow instructions on button covering kit to recover the bottoms.
4) Measure enough thread to pass through the back or seat twice plus enough extra thread for looping and knot tying.
5)With new fabric attached to front only of back or seat: thread needle but do not the a knot. From the backside of item, run needle and thread through to front and make sure you have half the thread in in the item and the other half of the thread on the front. Remove needle. Slide button loop onto thread and down to top of item. Loop thread through button twice.
6)Now rethread needle and push thread through to back of item close to first part of thread ( like sewing a button on a blouse only more layers).
7) The ends of thread together a couple of times - being sure to pull button tightly by pulling thread taunt and crisscrossing before knotting.
8) Replace removed padding from back of item and cover back side with new fabric.
Note: My grandmother always attached white muslin fabric to the item before putting on new fabric - this helped contain the "innerds" and kept old innerds and/or fabric from showing through.
when attaching buttons, you can use a long skinny metal crotchet hook,push it through from the back and hook it around the string that you have tied to the button and pull the two stands of string through, before tying it of, use a piece of old fabric or a piece of foam underneath the knot,to keep it from slipping through or sinking into the back, when tying string to the buttons, just fold sting in half, you will need the two pieces of string when tying off at the back,hope this helps.
ReplyDeletewhen attaching buttons, you can use a long skinny metal crotchet hook,push it through from the back and hook it around the string that you have tied to the button and pull the two stands of string through, before tying it of, use a piece of old fabric or a piece of foam underneath the knot,to keep it from slipping through or sinking into the back, when tying string to the buttons, just fold sting in half, you will need the two pieces of string when tying off at the back,hope this helps.
ReplyDeleteuse a long skinny metal crotchet hook pushed through the back to attach buttons
ReplyDeleteAmazing post! I also have two chairs I have owned since 1990. I can't imagine life without them. They are so comfy, but now so ugly....going to give this a try!
ReplyDeleteOr you could even cover the old fabric with new fabric. ... crecliners.blogspot.com
ReplyDeleteMy hubby inherited his grandfather's old leather Lazy Boy recliner, and it's very sentimental to him, yet it's very old & the material is in horrible shape! However, the chair itself is in great shape. The cost to have someone else recover this would cost way more than purchasing a new one, but a new 1 wouldn't be his grandfather's old chair! After seeing your post, I think I'm going to try to surprise him by attempting to recover it myself! I am a pretty crafty person, yet I've never recovered a recliner before. I will take your advice by taking it apart piece by piece & using them as a pattern. Thanks for helping me to gain the confidence to tackle such a project ... yours turned out great & I hope mine does as well! Great job & thanks for sharing!
ReplyDeleteI didn't read every comment above so if someone has already mentioned this, forgive my duplicate.
ReplyDeleteThere are special needles for tufting and usually available in stores like JoAnn's. I'm sure it would've made the buttons much easier, as you said :)
I have a Lane recliner (actually two... I was lucky to find two of the exact same chair on CL!) that I'll be tackling soon. Thankfully, no buttons but in all other aspects, very similar to your La-Z-Boy. Taking pictures as you disassemble is an excellent way of tackling projects like these. I do that with just about everything because what I think I might remember later isn't always the case! I recently re-did two Bergere chairs and was careful to document as I went along so that I could duplicate the re-installation of fabric.
https://www.facebook.com/media/set/?set=a.803250423104551.1073741849.571360482960214&type=3
Great job on your chair and very gutsy to do this project in stripes too! :)
This is so awesome!! Gonna try this on my lazy boy recliner (it's pretty worn down as I am the 3rd generation in my family who has had it)
ReplyDeleteI have this same chair also in vinyl/Naugahyde type fabric. I am curious to know how old it is. These must have been really good recliners to still be operable after all these years. Hard to let go of even though the arms have duck tape (decorative duck tape, mind you) I am too chicken to take it apart. I think late 60s, anyone know when this chair was made?
ReplyDelete